V3 ecu calibration
Subpage of Base setup menu
ECU calibration
- Safety mode
- Safe-mode is to prevent accident fuel-flooding of cylinders (blow of ign-fuses, etc...) in certain cases when user forgets to unplug injectors during firmware upload.
- When does firmware enter safe mode? From firmware version 1.1.83 the Injector and ignition outputs are disabled by default right after firmware upload, until they are enabled by
- either:
- a special firmware-version dependent configuration word (named prohibit, 2 bytes) re-enables it
- naturally, after firmware upgrade, this word will be wrong, and need to be set. VemsTune sets correct value automatically after upload of full (.vemscfg) config (to leave "safe-mode")
- or if you use Anti-theft iButton(from fw 1.1.84), enabled by touching on the configured iButton:
- Enable iButton anti-theft
- And set the prohibit/iButton low byte, and prohibit/iButton high byte
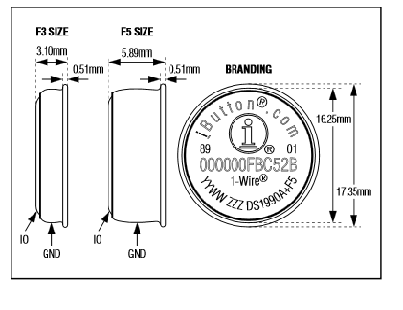
- For example : iButton serial code(6 byte hexadecimal format): 000000FBC52B

- prohibit/iButton high byte = C5 hexadecimal -> 197 (in the example)
- prohibit/iButton low byte = 2B hexadecimal -> 43 (in the example, last byte of the iButton serial code)
- prohibit/iButton2 (high and low byte) is very similar: touching a second iButton (matching this code) activates page-B (config and tables). Important: Input-based configswitch, when enabled, actually overrides the page A/B choice made by iButton, so select "disabled" or "Ibutton" for configswitch (not "MCP..." ) there. Normally Page-A would be wallet-mode and Page-B selected by second iButton would be high-power mode for the owner.
- iButton ADC keepalive: to keep the ECU operating (not going into safe mode) at sudden unintentional reboot (because of contact problem or anything):
- depends on "keepalive" special hardware (on the mainboard)
- it keeps the ECU enabled (prevent safe-mode) if rebooted within a few seconds ( within approximately 3-8 sec) after power-off.
- but after reboot, page-A will be active, even if page-B was originally selected by second iButton
- Needless to say, do NOT touch on I-button, before correct config is uploaded (only after reboot, and preferrably review)
- The above (I-button touchon when using I-button, config-upload otherwise) is the correct method and should be enough to leave safe-mode. Writing 190, 239 (into prohibit high,low bytes respectively means bypassing this nice safety feature!!!) is counterrecommended, only left as a last-chance, with that, installer really must disconnect injectors, ign-coils, etc... before firmware upload like in the old days (or possibly get cylinders filled with fuel when forgotten), More info here but don't do that.
- Factory Calibration for WBO2
- These values are supplied with your ECU.
- Wideband Sensor Free Air Calibration
- Before sensor is calibrated (or heated up for any reason), read Wideband settings:
- This is calibrated using the WBO2 Calibration dialog.
- TPS Settings
- Can be calibrated using the TPS Calibration dialog. Can be altered manually here. Useful TPS_low verification test before tuning Acceleration enrichment: When temporarily adjusting TPS_low 3 values lower (eg. 29 instead of 32): TPS gauge should show +1 (1% instead of 0%). Otherwise, if TPS reading stays 0% (TPS will not react for small pedal travel), acceleration enrichment will not be effective.
- MAP Sensor Range (slope)
- These are the recommended ranges for the standard MAP sensors.
- 115 : 104 kPa
- 250 : 250 kPa
- 300 : 304 kPa
- 400 : 414 kPa
- 700 : set "MAP range unit"> 510 and MAP range=778 kPa (=390 kPa in old VT where max is 510)
- It is recommended to use the offset (which can be positive or negative) to calibrate the sensors to show the actual barometric pressure at your location. This information can be found at www.weatherandtime.com. Average barometric pressure is 101 (101.3) kPa at see level, and declines 11.7kPa the first 1000m (airdensity * gravitationalacceleration * height = 1.2 * 9.81 * 1000 = 11772 but airdensity depends on temperature also). If no actual barometric pressure data available, rough numbers: 101 kPa(see level), 90 kPa (1000m altitude), 80 kPa (2000m altitude), 70kPa (3000m altitude), 61kPa (4000m altitude)... Calibrations in general should be done BEFORE engine tuning. Changing calibration values afterwards usually have negative effect (fuel, spark, air, ...).
- These are the recommended ranges for the standard MAP sensors.
- MAP Range Unit
- This is set to '2' for all standard MAP sensors. Other settings is for custom sensors.
- Table kPa Unit
- This is usually set to '2' for standard MAP sensors.
- MAP Filter
- This function smooths out the MAP sensor signal. Good starting values are :
- 4 cyl : Triggers num = 1, MAP samples = 15
- 6 cyl : Triggers num = 2, MAP samples = 10
- This function smooths out the MAP sensor signal. Good starting values are :
- Battery Calibration
- Use a volt meter at the ECU to measure the exact voltage, the recommended setting is near 192.
- EGT Sensor Calibration
- This value is supplied with your ECU.
- Temperature Sensors Curve Source
- Choose if you want to use the flash table uploaded with the firmware, or if you want to use the 17 point curve.